Team Building
There isn't any one team that will get you through the game. You can get away with using the same 5 characters for the first 6 or 7 story packs because the difficulty increases very slowly. After that, you're going to start needing a broadly developed roster in order to adapt to the enemy's composition.
The basic formula for PvE content looks like this:
- Take at least 2 supports
- Take 1-2 for damage
- Make sure you can use all of your abilities on turn 1 (combined SP cost of 15 or less for general PvE content)
The remaining positions are going to depend on what you're doing.
Supports include lots of roles: buffers, debuffers, batteries, pushers, chainers. Some costumes can fill multiple roles (eg. Track and Field Captain Levia can debuff, generate chains, and does respectable damage). All buffs and debuffs of the same type stack additively, as long as they come from different sources (unless the ability says otherwise). For your damage dealers, one with wide AoE damage is usually enough to clear out most of the trash, but you might need another to clean-up any leftovers.
- New Player Quick Start
- Basic Damage Formula
- Understanding Property Damage (Elemental Advantage and Weakness)
- Know Your Pushers
- What damage attribute are you using?
- What are Chains?
- Damage Amplification
- Crit Rate Overflow
- Do You Need Crit Damage Buffs?
- Specialty Roles
- Character Synergies
- Putting it All Together (Basic Template)
- Examples
- Tower of Pride
- Fiend Hunter
There's also a Optimal Support Calculator.
New Player Quick Start
As a new player, it can be overwhelming trying to figure out which characters are good. You get a bunch of low rarity characters dumped on you and some not very helpful advice from Justia in the first chapter.
The 3* and 4* costumes should get to +5 pretty quickly from doing draws. Some of them are better than the 5* costumes you start off with at +0. There is a big advantage to having characters with more than one costume, especially if you end up going multiple turns. This makes Justia particularly useful in the early part of the story.
Do not be afraid to level your damage dealers. Slimes are a time-gated resource, but it's not so limited that you can't afford to get throwaway characters to level 40. These investments still benefit you in the long run. Check the growth guide for more information.
If you got some 5*s from your draws, you can check the list of generalists to see if they're worth using over the characters listed here.
| Character | Property | Element | Tiles | Notes | ||
|---|---|---|---|---|---|---|
 |
Wiggle | Bomb Fanatic | Physical | Fire | Competitive with 5*s, but only one use per fight. He'll easily carry for the main story up through Black Feather (chapter 12). | |
 |
Kry | Liberated Marauder | Physical | Dark | Reduces enemy defense and does good damage. Note, however, that defense cannot go below 0. | |
 |
Kardis' Bullet | Ingrid | Physical | Water | Does more damage than +0 Scheherazade, but smaller range | |
 |
Gynt | Lugo Hunter | Physical | Wind | Does more damage than +0 Gray, but smaller range | |
 |
Maria | Archmage | Magic | Dark | Good damage and range for a 3*, but not enough early magic characters to make a team with | |
 |
Samay | Kind Liberator | Magic | Dark | Reduces enemy magic resist and does good damage | |
 |
Cynthia | Warmth within the Severe Cold | Magic | Water | Her initial damage is quite low, but it comes with a very potent DoT. Useful in fights that last more than 1 turn, assuming you can make use of her X pattern. You'll want to take her when you challenge the Crystal Cave of Fire. | |
 |
Justia | White Reaper, Knight of Blood | Physical | Light | You'll get 1 copy of each of these costumes in Chapter 1; Knight of Blood can also be obtained in the infinite roll. Ignores defense, but can't critical. She's very strong in the early story chapters, but less useful than the 3*s over time. She's also strong in PvP. | |
 |
Scheherazade | The Lapis Witch | Magic | Water | You'll receive a free copy during Chapter 2, but you can also get her in the infinite roll. Her damage is decent, but her range limits her for PvE content as a damage dealer. Mostly used in PvP, but occasionally used for the rare preemptive buffs in PvE. | |
 |
Eleaneer | Piercing Magic Bow | Physical | Dark | Brand new accounts will only have her if they got her in the infinite roll, but she can be recruited later at the pub with a contract (note that she's lower priority than the other options). Good damage and the cheapest dispel in the game (tied with Scheherazade's limited Pool Party costume). You'll find her helpful during story chapters 10 and 12-14. | |
 |
Rou | Nature's Claw | Physical | Dark | You'll receive 1 copy of this costume through the Newbie Pass. Because of her range, the only thing she'll be useful for as a new player is in your Last Night line-up. While most of your characters are still wearing R quality gear, she'll do more damage than most costumes, as long as you give her all Crit DMG mods. You don't even need to level her to be effective because her damage scales off of the enemy's stats. | |
 |
Nebris | New Hire | Physical | Wind | You'll receive 1 copy of this costume through the Newbie Pass. She's exceptional in the late game, but requires all three of her costumes to be really good. She does top damage in Last Night. |
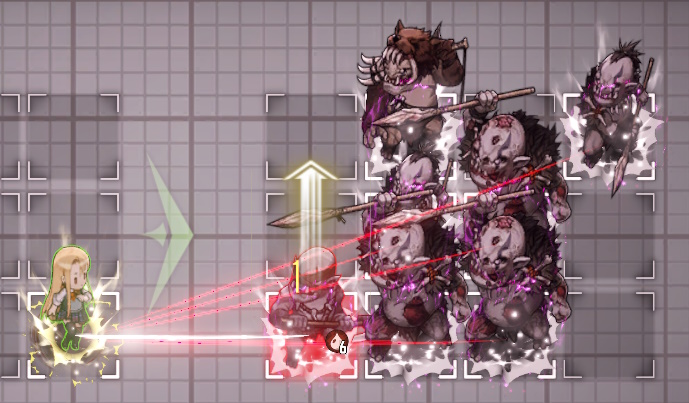
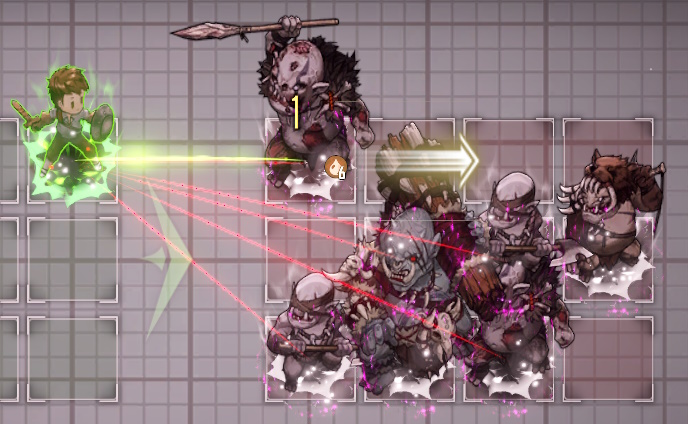
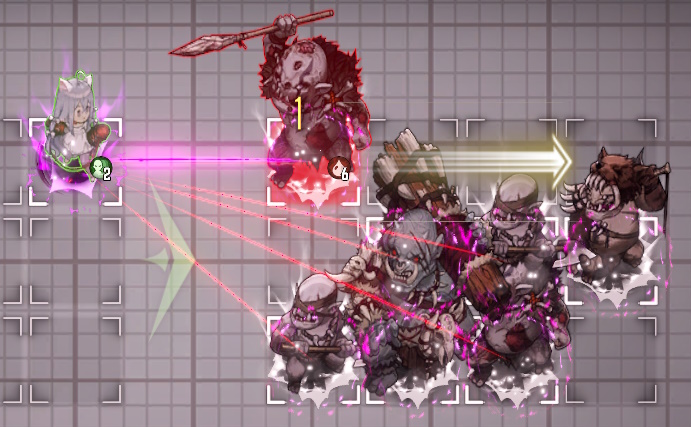
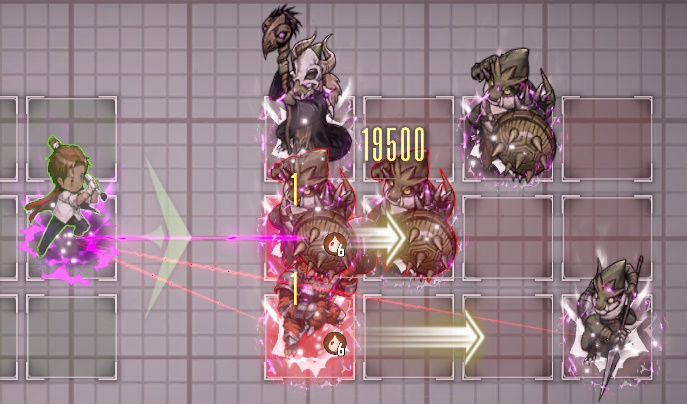
Video demonstrating using starter characters to clear story fights.
Every anniversary and half-anniversary up until the 2.5 anniversary released a new costume that can be upgraded to +5 just from doing simple tasks like logging in (note that the "claim now" button is easy to miss) or leveling up that character. These were historically only available for a limited time, but are always available now. You can find them under "Event" on your home screen.
| Character | Property | Element | Tiles | Notes | ||
|---|---|---|---|---|---|---|
 |
Rou | Stray Cat | Physical | Dark | She used to be considered decent when she was new if you needed a dark damage dealer, but she's pretty close to the bottom of the list in terms of damage now. Rou has limited use in PvE content outside of her White Cat costume for pushing or Red Riding Hood for Last Night. | |
 |
Dalvi | Summer Vacation | Magic | Wind | This is the most useful of the free costumes for general content. The range is good, SP cost is reasonable, and the damage is decent. The only down side is the long cooldown: you need her Bright Moon costume to fill in the gap for multi-turn content. She pairs very well with the pub recruitable Wind Dancer Venaka. | |
 |
Morpeah | Daydream Bunny | Magic | Water | She can summon a robo bunny that self-destructs in a 3x3 range, but you won't be able to command it to do so until the following turn. The costume can be quite strong in multi-turn combat, but only if you have her Beach Vacation and Apostle costumes as well. | |
 |
Dream Bride | Eclipse | Magic | Dark | Her lowest damage costume. The damage is on the low side for the range, and the SP cost is higher than her other costumes. Under normal circumstances, the maximum number of targets she can hit is 8. If you lack other choices, this is still a good option for a new player. | |
 |
Frozen Queen | Wilhelmina | Physical | Water | This is a single-target specialist. You won't get much use out of her as a new player outside of Last Night. As a character, she's quite important in competitive content, but it's her first two costumes that provide that value. |
The rest of the easily accessible characters either do poor damage due to the fact that they deal Fixed damage or are single target. You'll want to make sure you take either Arines or Elpis, depending on what kind of damage the other characters on your team do.
| Character (Costume) | Summary |
|---|---|
| Arines | physical buffer + crit chance |
| Elpis | magic buffer + crit chance |
| Samay (Kind Student) | universal buff + heal |
| Rigenette | concentrated fire (allows "very front" characters to skip) |
| Lucrezia | battery + silence |
| Kry (Violent Student) | knocks 2 enemies back 2 tiles, remains useful for a long time |
It's easier to form a physical team if you didn't get anything useful from draws. Magic tends to be have higher SP cost, so it's a little more challenging to use on top of having few good choices. So grab Arines, Wiggle, and any good physical characters you have. This should give you a good starting point until you get more familiar with the game's mechanics.
| Character | Costume | Role | SP Cost | |
|---|---|---|---|---|
| Just 3 Stars (Physical) | 11sp | |||
 |
Arines | Priest of Vitality | Buff | 2SP |
 |
Wiggle | Bomb Fanatic | AoE Damage | 3SP |
 |
Ingrid | Kardis' Bullet | Damage | 3SP |
 |
Gynt | Lugo Hunter | Damage | 3SP |
| Just 3 and 4 Stars (Physical) | 10sp | |||
|
Arines | Priest of Vitality | Buff | 2SP |
 |
Samay | Kind Student | Buff | 1SP |
|
Wiggle | Bomb Fanatic | AoE Damage | 3SP |
 |
Kry | Liberated Marauder | Armor Piercing/Damage | 4SP |
| Chapter 2 Magic | 15sp | |||
 |
Elpis | Hand of Salvation | Buff | 2SP |
|
Samay | Kind Student | Buff | 1SP |
 |
Dalvi | Summer Vacation | AoE Damage | 4SP |
 |
Maria | Archmage | Damage | 4SP |
 |
Scheherazade | Lapis Witch | Damage | 4SP |
Basic Damage Formula
TLDR: it's usually best to have multiple different types of damage boosts, rather than focusing on a single one like ATK.
- [ATK from gear]
- 1 + [all ATK buffs added together]
- 1 + [Crit DMG from gear] + [all Crit DMG buffs added together]
- 1 + [number of chains on the target before it's hit × 0.1]
- 1 + [increases enemy's damage taken buffs and debuffs added together]
- 1 + [inherent property damage] + [all property damage buffs added together]
- 1 - [target's DEF or Magic Resist]
- 1 - [target's reduces damage taken buffs]
- 1 - [target's property resist]
- [ability damage modifier]
The order might not be correct, but there is rounding between each step. In the case of multi-hit attacks, each hit is calculated separately due to increasing chain counts.
Understanding Property Damage (Elemental Advantage and Weakness)
This is the most important concept you need to understand before you start planning your team, even more important than deciding between physical or magic damage.
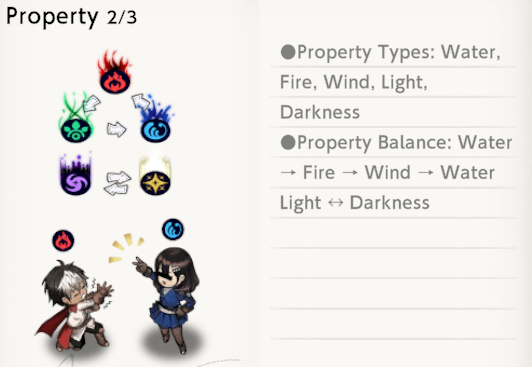
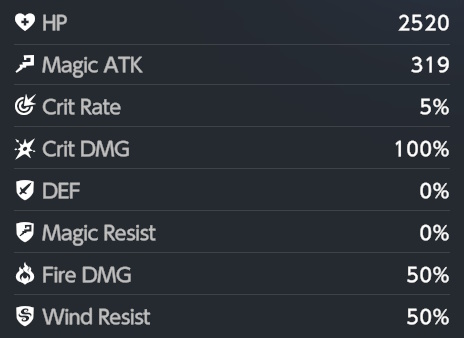
Property is just the game's way of saying element. All characters have a property damage attribute (eg. Fire DMG), most have a property resist attribute (eg. Wind Resist). These values are 50% by default. You can find this information by viewing any unit's attributes.
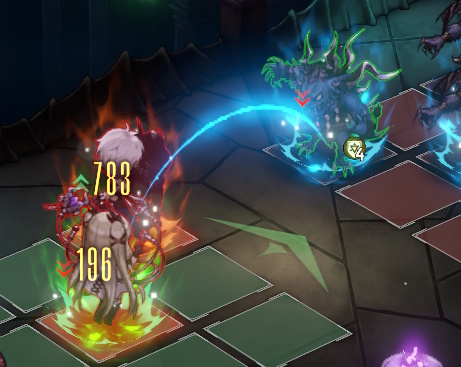
Property damage only takes effect if the character's element is strong against the enemy's element. If your character has the fire property and she's fighting a wind enemy, she's going to do 50% more damage. This can make weaker characters competitive with stronger ones, especially if you pair them with Diana.
The property resist attribute is a little more straight forward. If your character has the fire property and is attacking a water enemy, which has an inherent Fire Resist property, she's going to do 50% less damage. So if you don't have any characters who are strong against the enemy's element, the next best thing you can do is make sure you aren't using characters who are weak to it.
| Element | Advantage | Weakness | Physical | Magic |
|---|---|---|---|---|
| Light | Dark | none | Sacred Justia, Yuri, Ventana | Olivier, Michaela, Sword Maiden (collab) |
| Dark | Light | none | Luvencia, Blade | Sonya, Palette, Eclipse |
| Water | Fire | Wind | Sylvia, Darian, Wilhelmina, Rafina | Morpeah, Mamonir, Roxy (collab) |
| Fire | Wind | Water | Liatris, Anastasia, Eris (collab) | Loen, Levia |
| Wind | Water | Fire | Nebris, Tyr | Dalvi, Venaka |
Not all elements are equal. Sylvia might be the strongest character in water, but she's weaker than characters like Loen or Yuri if you're in a situation where you don't have elemental advantage or the range is not suitable for the situation.
There are three ways to increase your property damage: buffs, potentials, and awakening. Assuming the character has more than one costume, every character with an attack ability has at least one costume with two property damage nodes, each worth 15%. This brings your character up from 50% to 80% property damage. However, bonding to this costume is usually not the best choice if you don't have elemental advantage. Characters with the Strength or Magic awakening type can get an extra 10% property damage.
| Portrait | Character | Costume | Description |
|---|---|---|---|
 |
Diana | Adventurer of the Unknown | Has the largest property damage buff and also provides a small crit rate buff. This is the most easily accessible property damage buff and very easy to use for general content. |
 |
Refithea | Pure White Blessing | The property damage bonus is less potent than AotU Diana's, but also provides a chain bonus and energy guard. |
 |
Diana | Magical Innovator | Summons pets that can provide a buff that stacks. It has a prohibitively high SP cost for general content, rarely used outside of FH/GR. |
 |
Refithea | Poolside Fairy | The property damage bonus is half of what Pure White Blessing gives, unless the ally has a light property, then it's the full amount. Also reduces the SP cost of ally's abilities by 1. It has a prohibitively high SP cost for general content, rarely used outside of FH/GR. |
For general content, Diana will be your go-to, but there will be times Refithea is the better choice.
-
Diana, Adventurer of the Unknown -
Refithea, Pure White Blessing
Note that there are a few places where enemies don't have an element. Just use your strongest characters and skip the property damage buffs.
Know Your Pushers
Pushing enemies around lets you increase how many enemies you can hit by your team's AoE attacks, or make inaccessible enemies more accessible. Bosses and a few other enemies are immune to knockback.
The good thing about pushers is that you don't need to level them in order for them to be effective, unless you plan on having them use an ability on a following turn.
| Costume | Description |
|---|---|

|
|

|
|

|
|

|
|

|
|
Most characters knock the enemy straight back, but there are a few that push different directions.
| Direction | Very Front | Skip |
|---|---|---|


|


|
|


|


|
|


|

|
|


|
|
|
 |


|
|

|
Summons can have a different knockback direction than the character who summons them.
| Portrat | Unit | Costume | Targeting | Knockback | Range |
|---|---|---|---|---|---|
|
Morpeah | Any | Skip | ||
 |
Persona of Worship | Beach Vacation | Very Front | ||
 |
Persona of Slander | Beach Vacation | Very Front | ||
 |
Bunny Spectre | Daydream Bunny | Very Front | ||
|
Diana | Any | Skip | ||
 |
Magic Amplifier ET001 | Magical Innovator | Very Front |
What damage attribute are you using?
Physical attackers use ATK, magic uses Magic ATK. It's usually best to stick to either physical or magical damage characters within any given team to maximize the damage boost you get from your supports.
Supports
There are notable supports for both damage attributes. If they have low upgrades, costumes like Dark Saintess Liberta, B-Rank Idol Helena, and Medical Club Teresse can be worse than their more common counterparts.
- Take 1-2 ATK/Magic ATK buffers, at least one of them should also buff crit rate
- Take 1-2 damage amplifiers, if you have them
| Support Type | Physical | Magic | Any |
|---|---|---|---|
| ATK/Magic ATK + crit rate buff |

|

|
|
| ATK/Magic ATK buff | 
|

|


|
| Damage Amplification | 
|

|
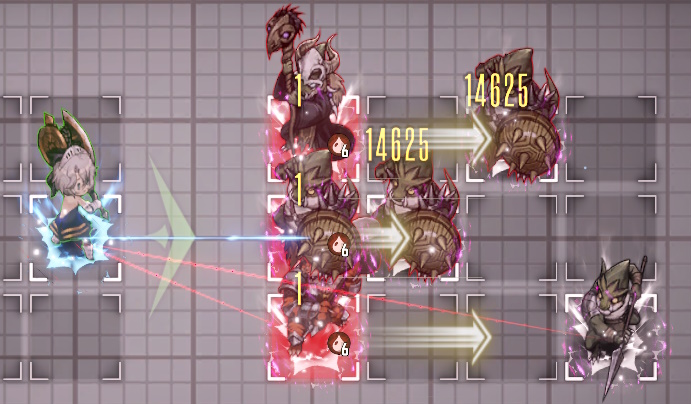
What are Chains?
Every time you hit an enemy in a single turn, the chain counter for that enemy goes up. Each enemy has its own chain counter. For every chain, your next attack on that target gets a 10% damage boost. This applies to each hit of a multi-hit attack, too. If you have chain 10, the next hit will do 100% more damage. This means you should use your weaker multi-hit attacks before your stronger low-hit attacks if you want to do the most damage.

It is always better to use multi-hit abilities before single-hit abilities. Costumes like Game Club Rafina (3-hit) and Track and Field Captain Levia (4-hit) are particularly attractive because they bring more to the table than just chains.
- Chain Reinforcement
- Buff
- Increases the number of chains that character will generate
- Chain Weakening
- Debuff
- Increases the number of chains that are generated on the target
| Portrait | Character | Costume | Description |
|---|---|---|---|
|
Refithea | Pure White Blessing | Chain Reinforcement. In addition to increasing property damage, she increases the amount of chains your characters generate by 1. This ability has to be used every turn due to its short duration, making it challenging to time the usage of her other costumes in long fights. |
 |
Celia | Masquerade Bunny | Chain Reinforcement. This costume has a self-buff that increases the amount of chains she generates by 1 (The Curse goes from generating 7 chains to 14, 21 with Refithea). Primarily used in Fiend Hunt/Guild Raid. Introduced as a limited costume in December 2023. |
 |
Wilhelmina | Water Park Queen | Chain Reinforcement. This costume has a self-buff that increases the amount of chains she generates by 1 (Iron Monarch goes from generating 12 chains to 24, 36 with Refithea). Primarily used in Fiend Hunt/Guild Raid and Last Night. |
 |
Teresse | Beachside Angel | Increases the damage your entire team does, as long as your target has 5 chains or less on it. This means you can use Descendant of the Great Witch Celia (5 hits) plus Last Hope Loen (1 hit) and still get the damage boost. If you use Track and Field Team Loen (2 hits) instead, only the first hit of Loen's attack gets the damage boost. This stacks additively with the "vulnerability" debuff. Introduced as a limited costume in August 2024. |
 |
Liberta | Onsen Manager | Once the target has 10 chains on it or more, your allies will do extra damage. This stacks additively with the "vulnerability" debuff. |
 |
Zenith | Poolside Guardian | Chain Damage Weakening. At +5 with potentials, she increases the amount of chain damage the target takes by 10%. |
 |
Eris | Esteemed Adventurer | Her damage nearly doubles if her attack will result in 7 chains or less. Introduced as a limited costume during the Mushoku Tensei collaboration in May-June 2024 and is unlikely to receive a rerun. |
 |
Luvencia | Wild Dog | At +5, her damage doubles if her attack will result in a chain that's a multiple of 3 (calculated separately for each hit of the attack). Worst outcome is when the number of chains on the target before she attacks is a multiple of 3 (eg. 0, 3, 6). Best outcome is when there is a chain bonus that is a multiple of 3n+2 (eg. 2, 5, 8), making every attack generate 3 chains. |
 |
Luvencia | Ocean Vanguard | Gains a buff that adds an ATK buff stack for every chain generated by any of her attacks for 6 turns. Once she has 24 stacks, she gains a chain damage bonus for 2 turns when she uses this skill again. |
Damage Amplification
Any time an ability says something to the effect of increases damage [taken] by x%
, it falls under the damage amplification term. When it's a debuff, it's called Vulnerability, while the buff is called Augmentation. These stack together additively.
| Portrait | Character | Costume | Purpose | Notes | SP | Hits | Range |
|---|---|---|---|---|---|---|---|
| Any | |||||||
|
Teresse | Beachside Angel (limited) | Buff | Increases damage if the target has 5 or less chains on it. | 4-2SP | ||
|
Liberta | Onsen Manager | Buff | Increases damage if the target has 10 or more chains on it. Primarily used for Fiend Hunter, Guild Raid, Last Night, and Tower of Salvation. | 3-2SP | ||
 |
Zenith | Robin Hood | Debuff + Concentrated Fire + Chains | 2-0SP | |||
 |
Granadair | Shrine Maiden of Purification | Buff | In addition to a flat augmentation buff, all debuffs are absorbed from allies and 1 stack of augmentation for each debuff removed from each ally (max 15). | 4-3SP | ||
 |
Sonya | Shadowed Dream | Debuff | Applies a non-specific vulnerability by default. If the attack would result in 6 or more chains on the target, a more potent dark vulnerability is applied instead. | 4-3SP | 1-hit | |
") |
Mamonir | Miracle Marine | Debuff | Applies a stacking debuff to the attacker when she's struck (in FH/GR, the vulnerability will always apply to the head of the fiend). Due to the short duration of the debuff, it works best against fiends where she only takes a couple hits each turn so it can refresh the duration. | 3-2SP | ||
 |
Seir | New Hire | Buff | Applies a stacking buff to all allies every time she's hit. Requires the cooldown and duration potentials to be useful. You'll really only use her in Fiend Hunter or Guild Raid if the boss has multiple multi-hit attacks. | 3-2SP | ||
 |
Eleaneer | Shadow Bunny | Debuff | Applies a domain for the entire battlefield. This cannot be dispelled and persists across team transitions in Fiend Hunt. Allies get an ATK/M.ATK buff, enemies get a vulnerability debuff. Both effects are roughly half as strong as what you'd get from a costume that specializes in only one. | 5-4SP | ||
| Physical | |||||||
|
Rafina | Game Club | Debuff + Chains | 5-3SP | 3-hit | ||
 |
Eris | Your Very Own Cat | Debuff + Chains | The vulnerability is only on the main target. Potential increases range to 3x2 | 6-4SP | 5-hit | |
 |
Blade | Young Lady | Debuff + Chains | The vulnerability is only on the main target. Potential increases range to 3x3 with main target in the front row (same as Wind Dancer Venaka). | 5-4SP | 4-hit | |
| Magic | |||||||
|
Levia | Track and Field Captain | Debuff + Chains | Main target takes 20% additional damage | 5-4SP | 4-hit | |
|
Priestess | Earth Mother Believer | Debuff | Can be used every turn. Part of the Goblin Slayer collaboration in June 2025 and unlikely to rerun. | 4-3SP | 1-hit | |
| Other | |||||||
|
Venaka | Wind Dancer | Wind Debuff | Very front targeting with the main target in the front row | 4-3SP | 1-hit | |
 |
Ventana | Onsen Practitioner | Light Debuff | Requires the target to have a Taunt or Concentrated Fire effect. | 3-2SP | 1-hit | |
|
Morpeah | Apostle | Summon Debuff + Concentrated Fire | 3-1SP | 1-hit | ||
 |
Rubia | Maid Bikini | DoT Debuff | 3-1SP | 1-hit | ||
Crit Rate Overflow
If you go past 100% Crit Rate, you gain 6% Crit DMG for every 1% CR you go over. So if you have the following costumes on a character with 10% base crit rate, you'll get an extra 240% crit damage.
- Adventurer of the Unknown Diana
- B-Rank Idol Helena/Dark Saintess Liberta
- Red Riding Hood Rou
| Portrait | Character | Costume | Max Crit Rate |
|---|---|---|---|
|
Diana | Adventurer of the Unknown | 30% |
| Helena | B-Rank Idol | 50% | |
|
Liberta | Dark Saintess | 50% |
 |
Rou | Red Riding Hood | 50% |
|
Elpis | Hand of Salvation | 35% |
|
Arines | Priest of Vitality | 30% |
There are a few damage costumes that apply a crit rate self-buff, such as Pool Party Lathel and Miracle Rose Liberta.
Do You Need Crit Damage Buffs?
Generally speaking, crit damage buffs are lower value than other types of buffs because they stack additively with all of your other sources of crit damage (eg. gear, potentials), unlike ATK buffs that are multiplied on top of your ATK attribute. Most of the time, you'll only use crit damage buffs because you're already taking that character for another reason. There are a few exceptions to this.
- You have low crit damage to begin with
- Mirror Wars (gear is built for survivability and/or crit rate)
- Golden Colosseum (no gear, but there are some crit damage blessings)
- Tower of Salvation (no gear, but there are some crit damage artifacts)
- You're using characters who's abilities scale on something other than ATK (more augmentation is usually a better choice)
- You have room for a lot of supports (eg. Last Night)
-
Rou, Red Riding Hood -
Refithea, The Gluttonous
Rou is your first choice for this role. If Refithea is used, it's usually because you're taking her for her other costumes and the crit damage buff is an added bonus. Unless you need 80% or more crit rate, the optimal team composition for a single-turn clear will have either Helena/Liberta or Rou, not both. Use the Optimal Support Calculator to know for sure if this is the right choice for your team composition.
Specialty Roles
You won't always need these, but there will be times when you can't brute force the problem by throwing more damage at it.

| Purpose | Description | Example Costumes |
|---|---|---|
| Dispel | Remove dangerous buffs like counter or annoying damage reduction buffs. Each costume that can dispel has a different tile pattern, so it's helpful to get all of them! |
|
| Silence | Enemy can't use abilities. If you can't kill the enemy outright, sometimes the next best thing you can do is stall with silence. Most bosses are immune to this. |
|
| Battery | SP Generation. Note that the SP doesn't become available until the following turn. |
|
| Armor Break | Defense or magic resist reduction. Note that these stats cannot go below 0. Not very many enemies have defense/resist, usually just bosses. |
|
| Concentrated Fire | Applies a taunt effect to the enemy. This allows characters to hit targets they wouldn't normally be able to hit due to positioning or by allowing "very front" characters to "skip". |
|
| Tanks | You'll rarely use these outside of Mirror Wars or Tower of Salvation. There are two kinds: evasion and damage reduction. Evasion is better suited against single high-damage attacks, damage reduction works better against multi-hit attacks. |
|
Character Synergies
There are very few characters that require being paired together due to conditions on their abilities. These are novel combinations that don't enhance other costumes in the same way.
| Costume | Synergies | Notes |
|---|---|---|
|
")
|
All of Ventana's costumes require the enemy to have Taunt or Concentrated Fire on them to get the conditional effects. |
")
|
")
|
Granhildr needs her Comeback Idol costume for best results. Blade needs the shield to survive so she can counter. |
") |
|
For turn 1 clears, you need an extra character to provide Vulnerability to trigger Overheat's conditional damage. This is unlikely to be a useful combination outside of Tower of Salvation. For multi-turn fights, you'd just lead with her Track and Field Captain costume. |
") |
")
")
|
For turn 1 clears, you need an extra character to provide a DoT to trigger Maid Name R's conditional damage. This is unlikely to be a useful combination outside of Tower of Salvation. For multi-turn fights, you'd just lead with her Rodev's Star costume. |
Putting it All Together (Basic Template)
There is no "one size fits all" team. You have to find the right combination of buffs, debuffs, pushers, and chains to make your team out damage the enemy. Lots of enemies? Use big AoE attacks. Can't kill hit all enemies in a single AoE volley? Bring another damage dealer or silencer to deal with whatever you miss. A single boss fight? Grab your highest damage single-target attacker and buff the hell out of them.
Ideally, you want at least one from each of these categories (if applicable) before taking a second one in the same category. Note that how many supports you're taking and your character's stats can change who is best to use, consult the Optimal Support Calculator to be sure.
- ATK/Magic ATK Bonus
- Property Damage Bonus
- Damage Amplification
- Chains
If you're lacking Rafina or Levia for providing chains, consider Sage of Blue Clouds Olstein, any of Celia's costumes, or another high-chain costume you have.
| Portrait | Character | Costume | Purpose | Notes | SP | Hits | Range |
|---|---|---|---|---|---|---|---|
| Any | |||||||
|
Teresse | Beachside Angel (limited) | Damage Amplification Buff | Skip if the total number of hits your team will do is 7 or more | 4-2SP | ||
|
Diana | Adventurer of the Unknown | Property Damage + Crit Rate Buff | Skip if you don't have elemental advantage | 3-2SP | ||
|
Rou | Red Riding Hood | Crit Rate and Crit Damage buff | This is a top pick if you have room for 4 supports when you have elemental advantage, or 3 supports if you don't have the advantage. | 4-2SP | ||
| Physical | |||||||
|
Rafina | Game Club | Damage Amplification Debuff + Chains | 5-3SP | 3-hit | ||
|
Liberta | Dark Saintess | ATK + Crit Rate Buff | Better ATK buff than Arines, but only if +2 with potentials. Better crit rate buff than Arines, but only if +3. Also restores SP. | 3-1SP | ||
|
Arines | Priest of Vitality | ATK + Crit Rate Buff | Skip if you have Liberta and don't need to cap your crit rate and have another ATK buffer. | 2SP | ||
|
Lathel | Homunculus | ATK Buff | The first 2 turns of the buff are higher than any other ATK buffer. The remaining turns are about the same as Arines, depending on dupes and potentials. | 2-1SP | ||
| Magic | |||||||
|
Levia | Track and Field Captain | Damage Amplification Debuff + Chains | Main target takes 20% additional damage | 5-4SP | 4-hit | |
| Helena | B-Rank Idol | Magic ATK + Crit Rate Buff | Better Magic ATK buff than Elpis, but only if +2 with potentials. Better crit rate buff than Elpis, but only if +5. | 3-1SP | |||
|
Elpis | Hand of Salvation | Magic ATK + Crit Rate Buff | Skip if you have Helena and don't need to cap your crit rate and have another Magic ATK buffer. | 2SP | ||
|
Granadair | Queen of Gluttis | ATK Buff | The first 2 turns of the buff are higher than any other Magic ATK buffer. The remaining turns are about the same as Elpis, depending on dupes and potentials. | 2-1SP | ||
| Leftovers | |||||||
|
Granadair | Shrine Maiden of Purification | Damage Amplification Buff | Skip if you've using Queen of Gluttis. | 4-3SP | ||
|
Teresse | Medical Club | ATK & Magic ATK Buff | If you have Beachside Angel, you'll almost never use this on turn 1. If you aren't using her Beachside Angel costume, skip if less than +2 or you have a second ATK/Magic ATK buffer that's better. | 4-3SP | ||
|
Samay | Kind Student | ATK & Magic ATK Buff | Only use if you're short on SP or lacking a second ATK/Magic ATK buffer. Must be used every turn. | 1-0SP | ||
Example Teams
Here are a few teams you can use for inspiration, some have one free slot for a character of your choice. You may need to take SP reduction potentials or obtain a certain number of costume duplicates before you can squeeze all of your abilities into the first turn.
Example Physical Teams
Physical teams are generally more accessible to newer players, since the majority of 3* costumes are physical. They're more likely to have self buffs and tend to have smaller range, lower SP cost, and greater damage potential in multi-turn fights.
| Light | Dark | Fire | Water | Wind | |
|---|---|---|---|---|---|
| Large Range (6+ tiles) |
") |
|
") |
") |
|
| Medium Range (3-6 tiles) |
") |
|
") |
") |
|
| Single Target | |
|
") |
") |
") |
| Portrait | Character | Costume | Role | SP Cost | Hits | Range |
|---|---|---|---|---|---|---|
| Early Liatris Carry (Physical) | 14-10sp | Chain-8 | ||||
|
Arines | Priest of Vitality | ATK + Crit Rate Buff | 2SP | ||
|
Samay | Kind Student | ATK Buff | 1SP | ||
 |
Rafina | Game Club | Damage Amplification/Chain | 5-3SP | 3-hit | |
 |
Liatris | Rodev's Star | AoE Damage/Chain | 6-4SP | 5-hit | |
| No Advantage Physical | 20-14sp | Chain-5 | ||||
 |
Liberta | Dark Saintess | ATK + Crit Rate Buff | 3-1SP | ||
 |
Lathel | Homunculus | ATK Buff | 2-1SP | ||
|
Rafina | Game Club | Damage Amplification/Chain | 5-3SP | 3-hit | |
 |
Sacred Justia | Reclaimed Destiny | AoE Damage | 6-5SP | 1-hit | |
 |
Yuri | Comeback Idol | Focused Damage (optional) | 4-3SP | 1-hit | |
| General Purpose (High Crit Rate) | 20-14sp | Chain-5 | ||||
|
Liberta | Dark Saintess | ATK + Crit Rate Buff | 3-1SP | ||
|
Arines | Priest of Vitality | ATK + Crit Rate Buff | 2SP | ||
|
Rafina | Game Club | Damage Amplification/Chain | 5-3SP | 3-hit | |
|
Sacred Justia | Reclaimed Destiny | AoE Damage | 6-5SP | 1-hit | |
|
Yuri | Comeback Idol | Focused Damage (optional) | 4-3SP | 1-hit | |
| General Purpose (High Crit Rate) | 20-13sp | Chain-5 | ||||
|
Liberta | Dark Saintess | ATK + Crit Rate Buff | 3-1SP | ||
|
Arines | Priest of Vitality | ATK + Crit Rate Buff | 2SP | ||
 |
Teresse | Beachside Angel | Damage Amplification | 4-2SP | ||
|
Rafina | Game Club | Damage Amplification/Chain | 5-3SP | 3-hit | |
|
Sacred Justia | Reclaimed Destiny | AoE Damage | 6-5SP | 1-hit | |
Example Magic Teams
Magic costumes tend to have higher SP costs than their physical counterparts. This makes it a lot more challenging to get all of your abilities off on turn 1 if you don't have every possible SP reduction. The up side is that you have a wider variety of large AoE attacks, making them the preferred choice in most elements for clearing out large groups of enemies in a single turn.
| Light | Dark | Fire | Water | Wind | |
|---|---|---|---|---|---|
| Large Range (6+ tiles) |
|
")
|
")
|
")
|
|
| Medium Range (3-6 tiles) |
") |
")
|
|
")
|
|
| Single Target | ") |
| Character | Costume | Role | SP Cost | Hits | Range | |
|---|---|---|---|---|---|---|
| General Purpose (with SP Recovery) | 17-14sp | Chain-6 | ||||
|
Elpis | Hand of Salvation | Magic ATK + Crit Rate Buff | 2SP | ||
| Helena | B-Rank Idol | Magic ATK + Crit Rate Buff | 3-1SP | |||
 |
Levia | Track and Field Captain | Damage Amplification/Chain | 5-4SP | 4-hit | |
 |
Loen | Last Hope | AoE Damage | 5SP | 1-hit | |
 |
Lucrezia | Seductive Wings | Silence/Battery | 2SP | 2-hit | |
| Strong Elemental Advantage for Fire | 19-14sp | Chain-10 | ||||
 |
Diana | Adventurer of the Unknown | Property Damage + Crit Rate Buff | 3-2SP | ||
 |
Refithea | Pure White Blessing | Property Damage + Chain Buff | 3-2SP | ||
| Helena | B-Rank Idol | Buff | 3-1SP | |||
|
Levia | Track and Field Captain | Damage Amplification/Chain | 5-4SP | 4-hit x 2 | |
|
Loen | Last Hope | AoE Damage | 5SP | 1-hit x 2 | |
| General Purpose Magic (High Chains) | 18-13sp | Chain-25 | ||||
|
Refithea | Pure White Blessing | Property Damage + Chain Buff | 3-2SP | ||
| Helena | B-Rank Idol | Buff | 3-1SP | |||
 |
Olstein | Sage of Blue Clouds | Chain + Weaken + Dispel stat buffs | 2-1SP | 7-hit x 2 | |
|
Levia | Track and Field Captain | Damage Amplification/Chain | 5-4SP | 4-hit x 2 | |
|
Loen | Last Hope | AoE Damage | 5SP | 1-hit x 2 | |
| Character | Costume | Role | SP Cost | Hits | Range | |
|---|---|---|---|---|---|---|
| General Purpose (High Crit Rate) | 19-14sp | Chain-5 | ||||
|
Elpis | Hand of Salvation | Magic ATK + Crit Rate Buff | 2SP | ||
| Helena | B-Rank Idol | Magic ATK + Crit Rate Buff | 3-1SP | |||
|
Teresse | Beachside Angel | Damage Amplification | 4-2SP | ||
|
Levia | Track and Field Captain | Damage Amplification/Chain | 5-4SP | 4-hit | |
|
Loen | Last Hope | AoE Damage | 5SP | 1-hit | |
| General Purpose (with Clean-Up) | 21-15sp | Chain-6 | ||||
| Helena | B-Rank Idol | Magic ATK + Crit Rate Buff | 3-1SP | |||
|
Teresse | Beachside Angel | Damage Amplification | 4-2SP | ||
|
Levia | Track and Field Captain | Damage Amplification/Chain | 5-4SP | 4-hit | |
|
Loen | Last Hope | AoE Damage | 5SP | 1-hit | |
 |
Venaka | DJ | Armor Piercing/Focused Damage | 4-3SP | 1-hit | |
| Elemental Advantage for Fire | 19-14sp | Chain-5 | ||||
|
Diana | Adventurer of the Unknown | Property Damage + Crit Rate Buff | 3-2SP | ||
| Helena | B-Rank Idol | Buff | 3-1SP | |||
|
Teresse | Beachside Angel | Damage Amplification | 4-2SP | ||
|
Levia | Track and Field Captain | Damage Amplification/Chain | 5-4SP | 4-hit x 2 | |
|
Loen | Last Hope | AoE Damage | 5SP | 1-hit x 2 | |
| SP Hungry Magic | 20-14sp | Chain-7 or 8 | ||||
| Helena | B-Rank Idol | Magic ATK + Crit Rate Buff | 3-1SP | |||
|
Teresse | Beachside Angel | Damage Amplification | 4-2SP | ||
|
Lucrezia | Seductive Wings | Silence/Battery | 2SP | 2-hit | |
|
Levia | Track and Field Captain | Damage Amplification/Chain | 5-4SP | 4-hit | |
 |
Morpeah | Beach Vacation | AoE Damage | 6-5SP | 1 or 2-hit | |
| Elemental Advantage for Wind | 15-12sp | Chain-12 | ||||
|
Diana | Adventurer of the Unknown | Property Damage + Crit Rate Buff | 3-2SP | ||
| Helena | B-Rank Idol | Magic ATK + Crit Rate Buff | 3-1SP | |||
|
Olstein | Sage of Blue Clouds | Chain + Weaken + Dispel stat buffs | 2-1SP | 7-hit | |
|
Dalvi | Summer Vacation | AoE Damage | 4SP | 4-hit | |
|
Venaka | DJ | Armor Piercing/Focused Damage | 4-3SP | 1-hit | |
| Elemental Advantage for Wind (Alternate) | 15-12sp | Chain-12 | ||||
|
Diana | Adventurer of the Unknown | Property Damage + Crit Rate Buff | 3-2SP | ||
| Helena | B-Rank Idol | Magic ATK + Crit Rate Buff | 3-1SP | |||
|
Olstein | Sage of Blue Clouds | Chain + Weaken + Dispel stat buffs | 2-1SP | 7-hit | |
 |
Venaka | Wind Dancer | Wind Vulnerability + AoE Damage | 4-3SP | 1-hit | |
|
Dalvi | Summer Vacation | AoE Damage | 4SP | 4-hit | |
| Elemental Advantage for Wind (Low Chain) | 18-12sp | Chain-5 | ||||
|
Diana | Adventurer of the Unknown | Property Damage + Crit Rate Buff | 3-2SP | ||
| Helena | B-Rank Idol | Magic ATK + Crit Rate Buff | 3-1SP | |||
|
Teresse | Beachside Angel | Damage Amplification | 4-2SP | ||
|
Dalvi | Summer Vacation | AoE Damage | 4SP | 4-hit | |
|
Venaka | DJ | Armor Piercing/Focused Damage | 4-3SP | 1-hit | |
Specialty Team Compositions
These teams are used for special scenarios, such as specific story fights or taking advantage of specific costume's conditional.
| Character | Costume | Role | SP Cost | Hits | Range | |
|---|---|---|---|---|---|---|
| Very First Solo Boss Kill (Partan, ch11 Fake Game) | 17-13sp | Chain-7 | ||||
|
Diana | Adventurer of the Unknown | Property Damage + Crit Rate Buff | 3-2SP | ||
|
Arines | Priest of Vitality | ATK + Crit Rate Buff | 2SP | ||
|
Liatris | Rodev's Star | AoE Damage/Chain | 6-4SP | 5-hit | |
|
Wiggle | Bomb Fanatic | AoE Damage | 3SP | 1-hit | |
 |
Lathel | Promise of Vengeance | Focused Damage | 3-2SP | 1-hit | |
| Advanced Solo Boss Kill (Nox, ch12 or ch14) | 14-9sp | Chain-14 | ||||
|
Diana | Adventurer of the Unknown | Property Damage + Crit Rate Buff | 3-2SP | ||
|
Refithea | Pure White Blessing | Property Damage + Chain Buff | 3-2SP | ||
|
Arines | Priest of Vitality | ATK + Crit Rate Buff | 2SP | ||
 |
Zenith | Robin Hood | Damage Amplification/Chain | 2-0SP | 6-hit x 2 | |
|
Yuri | Comeback Idol | Focused Damage | 4-3SP | 1-hit x 2 | |
| Advanced Solo Boss Kill (Nox, ch12 or ch14), crit fishing edition | 18-12sp | Chain-26 | ||||
|
Diana | Adventurer of the Unknown | Property Damage + Crit Rate Buff | 3-2SP | ||
|
Refithea | Pure White Blessing | Property Damage + Chain Buff | 3-2SP | ||
|
Zenith | Robin Hood | Damage Amplification/Chain | 2-0SP | 6-hit x 2 | |
|
Levia | Track and Field Captain | Damage Amplification/Chain | 5-4SP | 4-hit x 2 | |
 |
Angelica | Pool Party | Focused Damage | 5-4SP | 3-hit x 2 | |
| Single Target Physical | 18-12sp | Chain-41 | ||||
|
Liberta | Dark Saintess | ATK + Crit Rate Buff | 3-1SP | ||
|
Refithea | Pure White Blessing | Property Damage + Chain Buff | 3-2SP | ||
|
Zenith | Robin Hood | Damage Amplification/Chain | 2-0SP | 6-hit x 2 | |
 |
Wilhelmina | Water Park Queen (or Iron Monarch) | Chains + Damage | 5-4SP | 9-hit x 3 | |
 |
Ventana | Snow White | Focused Damage | 5-3SP | 1-hit x 2 | |
My own prests
These presets are the starting points I use for most fights. It's quicker to start with one of these and change out a single character for a specific fight than it is to change each character manually. Unless you're underpowered, multi-turn fights tend to only happen for Guild Raid invasion days, Tower of Jealousy, and Tower of Wrath.
| Single-Turn Clear Teams | |||||
|---|---|---|---|---|---|
|
|
|
|
|
Light Season |
|
|
|
|
Dark Season | |
|
|
|
|
Fire Season | |
|
|
|
|
Water Season | |
|
|
|
|
Wind Season | |
| Multi-Turn Clear or Specialty Teams | |||||
|
|
|
|
|
Ventana |
") |
|
") |
|
Morpeah | |
|
|
|
|
|
Nebris |
Tower of Pride
Pretty much all of the general team building guidelines go out the window here. If you want to achieve the maximum score, you have to meet specific conditions. Sometimes you have no choice but to take mixed physical and magic teams or use a less than ideal support. Single-hit costumes are preferred: if the enemy dies before you finish all of your hits, then you only get credit for the damage dealt before it dies.
| Floor | Element | Bring at least... | Top Damage Costumes | Notes |
|---|---|---|---|---|
| 1 | Wind | 4 fire characters |
|
If you take Loen, you have to choose between Helena and Diana for support. Liatris can take both Liberta/Lathel and Diana |
| 2 | Dark | 4 light characters |
") * * |
Enemies have high DEF |
| 3 | Fire | 4 water characters |
|
|
| 4 | Dark | 4 light characters |
|
Enemies have high RES |
| 5 | Water | 3 wind characters |
|
|
| 6 | Dark | 2 dark and 2 light characters |
|
2F: If you're missing both recommended costumes, a highly invested Acting Archbishop Michaela can work. Otherwise you can go with an off-element single-hit magic character like Loen. Note that you'll need to take Layla for pushing instead of Diana. Trying to go physical either requires a DEF reducer like B-Rank Manager Gray or really good gear and max costume upgrades.
The other requirements for reaching the maximum score are as follows:
- Win on turn 1
- Win with full health (make sure to heal up before entering, take a burst healer like Lisianne if you're using HP sacrifice abilities)
- Deal at least 1M damage with a single attack (this can be spread over multiple targets, as long as it does 1M damage combined)
Check a more in-depth guide on DotGG.
| 1F | |
|
|
|
|
|---|---|---|---|---|---|
| 2F | |
|
|
|
|
| 3F | |
|
|
|
") |
| 4F | |
|
|
|
|
| 5F | |
|
|
|
|
| 6F | |
|
|
|
") |
Fiend Hunt
Fiend Hunt (FH) is a little bit different. Every two weeks, the season changes and a new fiend becomes available with completely different mechanics. The goal is to do as much damage as you can over a limited number of turns. The fiend doesn't do much damage at the early levels, so you don't need to gear much for defense until later. In later stages, you'll use two or even three teams: when one team finishes, the fiend's abilities are reset and the next team takes over and continues doing damage.
- Take advantage of elemental strengths and weaknesses
- Use characters with multiple costumes or quick cooldown abilities, multiple small damage chains can really add up
- Make sure to read all of the fiend's skill descriptions: some of them give you buffs or make the fiend take more damage, while others can do really bad things if you're improperly positioned
- Do not underestimate damage characters with little or no costume duplicates, you just need to make sure you have the most effective support characters you can get
Some characters will always be the best choice for a particular element, but others are going to depend on the specifics of that Fiend.
- Elemental weakness
- Weak tile placement
- The Fiend's abilities (buffs/debuffs given, number of multi-hit attacks, etc.)